Sunday 29 July 2018

porsche cayenne turbo 955 v8 exhaust bypass DIY guide

Love the sound of my cayenne turbo - but it's a pity you can only hear that V8 burble when you're right at the exhaust.

Many people have done an exhaust bypass - it's actually quite a clever and simple (and really cheap!) way to open up the sound of your engine!

What we're doing here is bypassing the rear muffler, by sliding some flexible pipe inside the muffler so the exhaust gases aren't muffled and pass straight through - so tell all your mates you've straight-piped your cayenne!

Tools and parts required

Instead of buying a new exhaust system, all we need for this exhaust bypass is...

  • Gloves and a mat to lie on
  • 15mm socket and/or wrench
  • To clean your exhaust: metal polish, rags, a rotary tool of some kind or wire brush
  • 2" (50mm) internal diameter flexible exhaust hose/pipe, about 1m long in length. A hacksaw or other tool to cut this pipe in half.

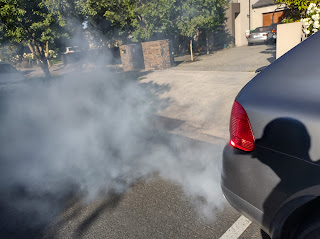
So, this is the standard appearance. A bit dirty! I've raised the car up as high as possible on the air suspension which gives plenty of room to get underneath.

Looking up under the exhaust tips, you'll see this clamp with a 15mm bolt on it (Some people have found theirs is 16mm though). Spray a bit of WD40 or equivalent, then crack it open and unbolt this clamp, then remove exhaust tips.


Put your filthy exhaust tips aside for the time being.


Now on my car (Australian spec Cayenne Turbo) there were these little pipe/projections visible in the rear muffler, and I was unlucky enough to have them on both sides. Some people report being able to remove these pipes by sawing away at them with a hacksaw blade - didn't work for me. I tried a dremel with every tool, no good either. Ultimately the only way for me to remove them was with a metal hole-saw attached to an electric drill. The holesaw got destroyed in the process, but at least these pipes came out!


Seriously, getting these little things out was the hardest part of the whole process. You could also use a small reciprocating saw with a long enough metal cutting blade if you have one.


This is the flexible exhaust pipe you'll need. Cost about AUD$50 delivered on ebay for about 1m length. Some people use 2" stainless pipe - that'll work too.


So this is how the flexible exhaust sits inside the muffler. There's a little bit of play, but I'm hoping the length will stop it from moving. If you look at the muffler you'll see two pipes going into the muffler - measure & cut your exhaust hose so that it allows the entrance pipes to be unblocked. I cut mine to about 45cm.


Anyway, now to cleaning the old exhaust tips - don't think it was ever done since the car was new! First sprayed with a lot of degreaser and all-purpose cleaner and rinsed. Used a wire brush on an electric drill to buff off all the old stain and corrosion.


Then used metal polish and rags to try to brighten up the tips a little. They'll never look like chrome exhaust tips due to the brushed metal finish, but they're a lot cleaner at least.


Both done.


Finally, reinstallation of the exhaust tips is the reverse of disassembly.

Of course - you'll want to check out this video for sound before & after!


Saturday 21 July 2018

Porsche 911 (996) CPS Crankshaft position Sensor replacement DIY guide - fix no start problem

So my 911 has been hibernating the garage for about 6 weeks now, as that's the last time I could start the car.

Initial problems: Wouldn't start when hot

Would have to wait 30-60 minutes for the car to cooldown, then would start as normal. Would turn the key, and absoultely nothing would happen, not even a starter motor crank.

So I'm not a mechanic, but have enough time to research this problem as it's very common.

The most likely cause of this problem was a bad starter-alternator cable. When old and corroded, when it gets hot the cable resistance would max out, preventing any current reaching the starter and thus not even a crank would happen. However, when cold the car would crank and start quickly, so not likely a starter motor problem.

Another problem: Battery not recharging

Car dash display would read 14V for about 30 minutes after being started, then would slowly drift down to 13V or even less. Another reason why it's likely to be a starter-alternator cable problem, as again when reaching a hot temperature, this cable would reduce current flow.

So I've had a few parts to fix this in stock for a while - new starter-alternator cable, new drive belt, new alternator regulator.

Then a new problem appeared - car wouldn't even start when cold.


Some research then told me it's a likely CPS (crankshaft position sensor) problem. From what I can figure out - when you turn the key, the starter motor turns over the engine (and crankshaft), which turns the flywheel which has a bunch of cutouts in it. The CPS reads this signal, and when appropriate to kick in some fuel and spark the computer would then fire up the engine. However, with a bad CPS the computer can't tell when to kick things on.

Main telltale sign is the tacho doesn't budge when trying to crank the engine. Engine cranks (so starter is OK) but not moving tacho = (probably) bad CPS.

This is a bigger problem than the first two... I can (kinda) live with the car not starting when hot for a little while, as I have other cars I can get around in. Battery not recharging - hook up to a CTEK battery maintainer every now and then. But a bad CPS means I can't even start the car - no bueno!

So I tackled this job today - replacing CPS. For the full start to finish video see bottom of this post.

Disclaimer

I'm not a mechanic. If you follow this guide, be prepared for everything to go wrong. I take no responsibility for what you're about to do. What I write here is fully hypothetical, invented, imaginary and not to be taken internally. In fact, stop reading this now, go outside and catch public transport instead of trying to work on your car.

Tools required

  • Jack and stands
  • Wheel nut remover tools - I use my impact air gun for this (lazy!)
  • 5mm hex socket and a loooong extension tool or two
  • 10mm socket (I used a small ratchet 10mm socket as there's not much space to get in there

This is the part I ordered from eBay - took a few weeks to arrive from UK to Australia. About $110AUD delivered.


 Jack up car and make it secure. I've placed another jack stand at the back of the car just in case


Remove wheel and set aside somewhere safe.

Now you need to see where the CPS is. There's a lot of things in the way, but if you look towards the central housing behind the suspension components you can spot it.


To get the CPS out, you need a 5mm socket. I'd advise against using a small allen/hex key thing as you might slip and strip the bolt. I used a 5mm socket with a couple of extensions so I could get a wrench onto it to break the seal. Then was pretty easy to back it out.


After the bolt it out, remove the CPS. Follow the cable and unhook it from the plastic clip, then up the top (where it's pretty hard to get your hands in) you should see a ground wire bolted to a 10mm bolt and then a harness. Get your 10mm socket up there somehow and unbolt the 10mm bolt, then with the bracket loose it's easy to unclip the harness.


Then... "installation is the reverse of removal" as all the instruction manuals say.

Did it work?


Now [spoiler] at the end of the video I've got my 911 back and running! I drove it around for about 2 hours, stopping about 3 times during this drive, turning the car off and then restarting it no problem. Then I got home and parked it for about 30 minutes, then hopped in for another drive.

This time, nothing. No click, no starter motor engaging, no cranking at all. So this is a recurrence of the starter-alternator cable problem that I originally had. However, since the faulty CPS at least lets me start the car, then next project will be to replace the starter-alternator cable, alternator regulator and drive belt. Stay tuned.

Tuesday 17 July 2018

welcome to dtmtune.com

Hi people!

This is a companion blog to my other site jdmtune.com.

The smart ones of you would have figured out why already. This blog will help keep track of repairs, modifications, ongoing issues etc of a couple of old porsches I've got as project cars.


Porsche 911 (996 Carrera 2 cabriolet)


The first one is the 911 carrera 2 cabriolet. Love the look of this car -black roof, black paint, black interior, and charcoal (almost black) wheels. This one I bought on impulse, and naturally being a 20 year old car it has issues. Has been sitting in my garage for the last month waiting on a crank position sensor to be delivered from UK - hoping to get this job done on the weekend coming.

The 996 model carrera is the most unloved of the 911 series - but given the crazy prices being commanded for all other 911s (look at the prices of 993s!) I figure that if I keep and drive this one for a year or two, I can move it on for the same price I paid for it - or maybe a little more!

The only downside of this particular car is that it's a Tiptronic - or auto as anyone sane would call it. A manual transmission would make this car 50% better - which is why this car cost 50% less than the next cheapest manual 911 996 at the time I bought it.

Porsche Cayenne Turbo (955)


The other one is a cayenne turbo. This is the car that porsche purists love to hate, but it's the car that saved Porsche - fact! It's got a proper 331kw 4.5L V8 twin turbo and plenty of torque. This is my current daily driver. Fast, luxurious, comfortable, can fit anything in the back.

The piece of crap - Audi A4 (B6 Avant S-line)


It took a while for me to get back into german cars, had a horrible experience owning an audi a4 - this one.


This was a 2004 audi A4 avant, s-line quattro I had many many years ago - it was only just out of warranty. It was nice to drive when it worked, which was something like 40% of the time I owned it. It was a reliable car, except for
  • coil packs blew
  • window regulators broke
  • glove box broke
  • low oil pressure problems
  • oil consumption
  • driver information system failed
so... typical VW/audi "reliability" right there. This one lasted 6 months before I threw it away, what a piece of crap.

aaaaaaand so now porsches, which will have dubious reliability too, except repair bills are potentially a lot more than the audi. Naturally 3 weeks after i bought the cayenne, it ended up on a flatbed towtruck because of broken coolant turbo Ts. Could've fixed it myself, except being the end of financial year I had no time to get into it.

Hopefully I can maintain and repair these P cars!


I have no mechanic training and no mechanical background, but I'm willing to give anything a crack - the worst case scenario is if I can't fix something, I'll get the car towed to a mechanic and get it fixed.


2004 cayenne turbo white smoke - not AOS but broken crankcase breather hose DIY repair

 So the other day noticed a huge amount of white smoke when starting the car cold, and a very high idle (1500rpm) when in neutral or park. R...