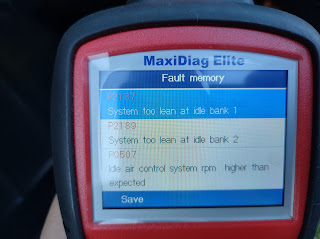
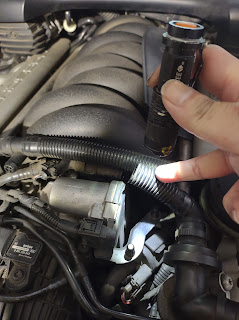
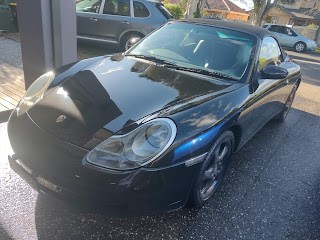
So the other day noticed a huge amount of white smoke when starting the car cold, and a very high idle (1500rpm) when in neutral or park.
DTM tune
Monday, 22 November 2021
2004 cayenne turbo white smoke - not AOS but broken crankcase breather hose DIY repair
Saturday, 30 October 2021
911 is sold
911 has been sold to a suitable buyer who has another awesome 996.
Bit sad to see it go, was a great daily driver and there's nothing like driving a convertible for open air motoring.
Considering buying another convertible now... just have no idea what to get, and probably not for a few months now that Victoria has finally reopened after the world's longest covid19 lockdown.
Monday, 13 September 2021
Project car Porsche 911 996 Carrera 2 Cabriolet - which path do I take? Sell as is, or repair? For sale in Melbourne Australia
So it's been a few weeks - I pulled off the exhaust, heat shield, coil packs and plugs and stuck my boroscope down each cylinder.
All great; no bore scoring on any of the cylinders. Piston heads look great too, for example this is cylinder #3.
Problem: at cylinder #6 we can see an imprint of a valve on the piston head :( No evidence of any metallic fragments or broken valve in the actual cylinder, and no cylinder wall scoring.
Diagnosis: After a bit of research, the most likely explanation is a stuck exhaust valve in cylinder 6. This would explain the initial presenting problem of a misfire, plus the noise heard on the last startup.
Best case scenario - lower or drop engine, remove bank 2 cylinder head, send to a machine shop for repair and refurbishment, reinstall and we're good to go!
Unsure if I can be bothered to be totally honest - this car has been up on jackstands in my garage for half a year while I've been busy upgrading/replacement a bunch of other parts... maybe it's time to grab a new project?
What I'll probably do is advertise the car as-is and see what offers I get. If they're all lowball offers, I'll leave the car in the garage until I get the motivation to research the procedure, drop the engine and pull the head off. I'll probably need a professional to help put it all back together again, that's the only part I'll outsource.
So I'll put together a condensed history of the car here that I can direct interested buyers to.
Summary: 1999 Porsche 911 (996) tiptronic cabriolet, 258,853km. Black body and roof, charcoal wheels. In my ownership since February 2018 at 246,498km.
The main problem:
Cylinder 6 stuck valve as described above. Requires bank 2 cylinder head removal, refurbishment and reinstallation. I have a video from mid July 2021 of the car idling beautifully after replacing all sparkplugs, as well as a video of the startup where you could hear ticking noise of valve impacting on piston head - car was only run for a few seconds, then shut down and not restarted since.
Summary:
- Obsessive enthusiast owner (me). Pages and pages recorded on excel spreadsheet and receipts/photos available for just about every part, some procedures have been put on this blog.
- Oil changes every 5000km during my ownership. Log books available
- Not under any finance, will supply VIN number for your PPSR report.
- 2 keys and books. Great external condition, 9/10. Interior 7/10, some wear as expected from a 22 year old car, minor marks on some interior panels, and wear on right side of drivers bolster. Some minor marks on 3 wheels.
- Driver's side door latch not keeping window dropped on closure; a common problem. Car comes with an aftermarket replacement door latch new in box, not installed.
- Was driving brilliantly until cylinder 6 issue. Pirelli P-Zero tyres with good tread and even wear.
Maintenance and repair history during my ownership
- 2018 April: Repaired rear left window regulator
- 2018 July: New Crank Position Sensor, alternator/starter Y cable, drive belt, alternator regulator
- 2018 September: Replaced centre console hinge
- 2020 May: New thermostat, new water pump, complete coolant flush and vacuum refill
- 2020 June: Removed front bumper for complete cleanout of radiators and AC condensors
- 2020 August: Complete removal and refurbishment of hydraulic cylinders for roof. Replaced boot strut.
- 2020 September: Replaced handbrake switch
- 2020 October: Paint correction + sealant
- 2020 December: Replaced broken rivet for roof cable, replaced roof drains and cleared all drains.
- 2021 February-August: Installed upgraded 997 oil pressure relief valve and spring. Replaced fuel pressure regulator, fuel pump, fuel filter. Refurbished throttle body and idle air control valve. Replaced all spark plug tubes and installed new Bosch sparkplugs.
Tuesday, 10 August 2021
Porsche 996 911 - Ticking noise on startup? Checking spark plugs and investigating carbon fouling on 2 of them.
Bit fed up with this car... one step forwards, 5 steps back.
After letting it sit for a week... tried starting it yesterday and hearing a ticking noise 🙄 and instant stall. Won't start it again!
Let's do a few basic checks.
Today got the mufflers off and coils/spark plugs out. Having done it before, only takes 30 minutes or less for both mufflers out, and same amount of time for coils/plugs.
Wheels didn't have to come off, but it was a nice day... gave them a real good clean - the three I could remove anyway, the front right will have to wait for another day.
Spark plugs out - wondering why 4 & 5 are carbon fouled while the rest look fine? Literally 0km driven and maybe 10 starts out of these plugs. All were wet from fuel, which you'd expect for multiple attemps to start the car.
typically carbon fouled plugs indicate
Sunday, 8 August 2021
Fix porsche cayenne rear hatch boot trunk falling down - replacing gas struts DIY for cayenne 955 9pa
Day 3 of lockdown #6 and no end in sight. Guess I've got a little free time to do those little chores I've been putting off.
The rear hatch on the cayenne has been falling down for a while now, and I've had replacement parts sitting around waiting to be installed.
You need
- Replacement gas struts for the rear hatch and rear window
- Flat and Philips screwdriver, Torx bits
Friday, 6 August 2021
Porsche cayenne 2004 (955, 9PA) brake booster faulty repair - P1914 P1431 - fix for almost free!
So the other day, was driving the trust cayenne home from work and got yet another fun fault message
Tuesday, 27 July 2021
Checking fuel output before filter, and new 996 fuel filter installed
2004 cayenne turbo white smoke - not AOS but broken crankcase breather hose DIY repair
So the other day noticed a huge amount of white smoke when starting the car cold, and a very high idle (1500rpm) when in neutral or park. R...

-
During 2019, the roof in the 911 was getting slower to open and close. Checking the hydraulic fluid reservoir, it was slowly dropping indic...
-
So the other day, was driving the trust cayenne home from work and got yet another fun fault message which never sounds like a good thing i...
-
Love the sound of my cayenne turbo - but it's a pity you can only hear that V8 burble when you're right at the exhaust. Many peopl...


